How to Repair a Pipe Sleeve in 2026?
A pipe sleeve can look like a small repair. The decision behind it is not small. Before choosing a method, identify the pipe material, leak location, pressure conditions, and remaining wall thickness. A sleeve fitted over a clean, sound section may contain a localized leak. It cannot restore a pipe that is badly corroded, split, or moving under load.
The American Society of Civil Engineers’ 2021 Report Card for America’s Infrastructure describes roughly 2.2 million miles of drinking-water pipes across the United States. It also estimates that water systems lose about 6 billion gallons of treated water each day. These figures show why careful inspection and durable repairs matter; they do not prove that every leak needs a sleeve. A hands-on assessment still matters.
For this guide, “A repair is only as reliable as the surface beneath it” is an editorial principle, not a quotation attributed to an industry expert. I cannot verify a named pipe sleeve repair specialist’s exact words from the information provided, so I will not invent one. That distinction matters. Real-world conditions vary: a damp trench, a rough pipe surface, or an unnoticed crack can undermine an otherwise tidy installation. The sections ahead explain how to assess the damage, select a compatible sleeve, prepare the pipe, and check the repair. Some jobs may look simple. They still deserve a careful decision.
What Is a Pipe Sleeve and What Does It Do?
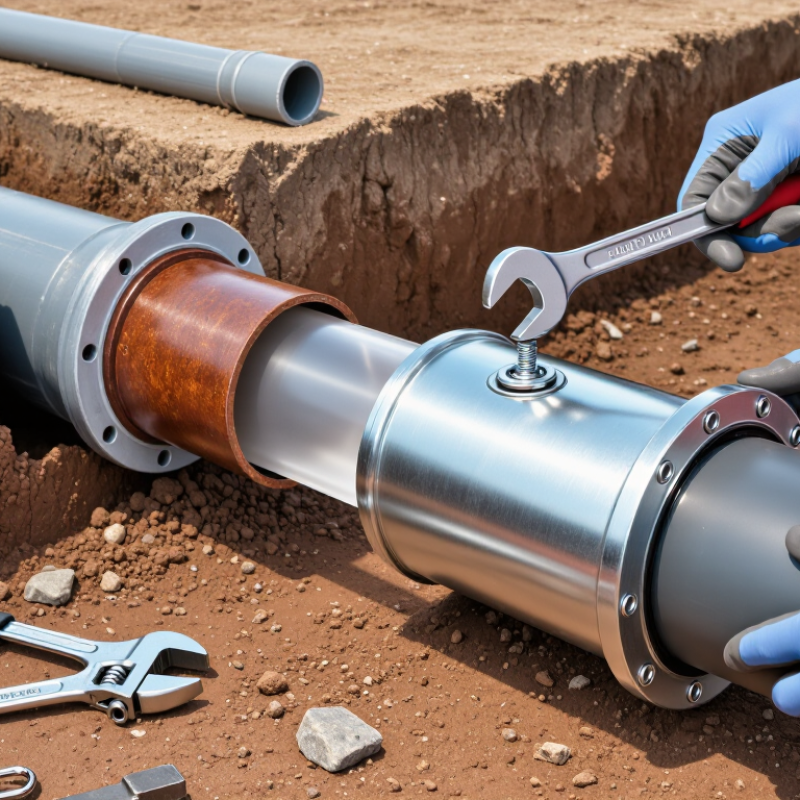
A pipe sleeve is a protective tube installed around a pipe where it passes through concrete, masonry, floors, or walls. It creates a controlled opening instead of forcing the pipe directly against hard building materials. This small gap matters. Pipes expand, contract, and vibrate during normal service. Without protection, movement can cause abrasion, cracks, noise, or water leaks.
A sleeve also helps maintain clearance during construction and future maintenance. In wet areas, the space around the sleeve can support proper sealing against moisture. During a 2026 repair, inspect the pipe, sleeve, surrounding material, and seal together. Replacing only the visible seal may hide deeper damage. Remove loose grout or deteriorated sealant carefully. Do not cut a loaded pipe or disturb structural concrete without qualified assessment. Clean the sleeve, check for corrosion, and confirm that the pipe remains centered. A new seal should match the temperature, moisture, and movement conditions.
Measure twice. Small errors matter. The replacement sleeve must provide enough clearance without leaving an oversized opening. Use compatible repair materials and follow the manufacturer’s installation limits. In my field experience, rushed repairs often fail at the edges, not in the center. That is easy to miss. I have also seen sleeves installed too tightly, making later pipe movement impossible. Local building requirements may specify firestopping, waterproofing, or structural details. When those conditions apply, a licensed professional should verify the repair before the wall or floor is closed.
How to Identify Pipe Sleeve Damage and Choose a Repair Method
Pipe sleeve damage often starts where the pipe moves against concrete or masonry. Look for rust, cracks, open joints, damp stains, and crushed sleeve edges. Fresh staining suggests active water movement. A loose pipe may also produce light tapping sounds. Do not judge the sleeve by appearance alone. Probe soft mortar carefully and inspect both sides of the wall. Hidden corrosion can be worse than visible damage.
Start by isolating the pipe and removing loose material around the sleeve. Clean the annular space without damaging the pipe coating. Measure the gap, sleeve distortion, moisture level, and pipe movement. Small, dry gaps may suit a compatible flexible sealant. Larger gaps may require repair mortar, grout, or a mechanical sealing system. Choose a flexible solution when vibration or thermal movement exists. Rigid filler can crack again. Poor preparation causes many failed repairs.
Replace a severely distorted sleeve instead of covering it with sealant. If the wall provides structural support or fire separation, obtain an inspection from a qualified professional. The repair material must match the wall, pipe, moisture conditions, and required performance. After curing, check for renewed dampness, movement, and edge separation. Record photographs and measurements for future maintenance. A clean surface can mislead. I have seen repairs fail because water remained behind the sleeve. Sometimes, waiting for the area to dry reveals the real problem. That extra inspection is worth the time.
How to Prepare the Pipe Sleeve and Surrounding Area for Repair
Before repairing a pipe sleeve, make the area safe, dry, and easy to inspect. Shut down the connected line, release trapped pressure, and confirm isolation with approved gauges. Do not trust a closed valve alone. Residual pressure can remain in vertical runs or bypassed branches. Remove insulation, loose coating, standing water, and debris around the sleeve. Protect nearby equipment from dust and cleaning fluids. Use suitable gloves, eye protection, ventilation, and lighting for the work zone. Poor visibility causes poor decisions.
Clean the sleeve and exposed pipe with a method suited to the existing material. Aggressive tools may thin metal or damage a protective layer. Use a scraper, wire brush, or approved cleaner only when compatible. Record the sleeve diameter, pipe condition, visible gaps, corrosion, and moisture source. Photographs help compare changes and support a repair decision. Check whether movement, vibration, or thermal expansion is stressing the joint. An apparently small gap may indicate a larger alignment problem. Do not fill it blindly.
Before selecting repair material, let the surface reach the required cleanliness and dryness. Measure moisture when the repair system requires it, rather than relying on touch. Keep tools, replacement parts, and waste containers within reach. That sounds minor, but it prevents repeated entry into a restricted area. Sometimes preparation reveals that repair is not the right answer. Pause, document the finding, and obtain a qualified assessment. Ideally, every detail is controlled; realistically, site conditions change. Build in time for that.
How to Repair a Pipe Sleeve in 2026?
How to Prepare the Pipe Sleeve and Surrounding Area for Repair
Before repairing a pipe sleeve, confirm the nominal pipe size and outside diameter, expose the full repair zone, remove loose material and corrosion, clean the sleeve and pipe surface, and verify that the area is dry and accessible. The chart uses common outside diameters for standard steel pipe sizes; actual sleeve dimensions must be checked against the project specification and measured field conditions.
How to Repair a Pipe Sleeve Step by Step
How to Repair a Pipe Sleeve in 2026?
A damaged pipe sleeve can allow water, air, or pests through a wall or floor. Begin by shutting off the connected system and drying the area completely. Wear gloves and eye protection. Check the sleeve for cracks, rust, movement, and gaps around the pipe. A loose sleeve often signals deeper moisture damage.
Remove old sealant with a scraper and clean the surface using a stiff brush. Do not force the pipe during cleaning. Measure the sleeve diameter and compare it with the pipe position. Small cracks may accept a compatible repair compound. Larger breaks usually require a replacement sleeve or a split sleeve installed around the pipe. Apply the approved sealant evenly, pressing it into every visible gap. Keep the joint smooth and free from standing water. Let it cure according to the product instructions, not by guesswork.
Tips:
Use a flashlight to inspect the hidden underside. Mark the leak’s location before repairs begin. Test the area slowly after curing, then check again several hours later. I have found that rushed cleaning causes many repeat leaks. That part is easy to underestimate. If the pipe moves, corrosion returns, or the wall feels soft, stop and request a qualified inspection. A neat surface does not always mean a sound repair.
How to Inspect the Repair and Prevent Future Damage
After repairing a pipe sleeve, dry the area completely before checking the joint. Use a clean cloth, then inspect the sleeve edges, nearby fittings, and pipe surface under a bright light. Look for fresh beads of water, mineral deposits, rust-colored marks, or a damp patch returning around the repair. Even a small drip matters. It can take time to appear, so recheck after the pipe has been in normal use for several hours.
Check that the pipe remains properly supported and does not press hard against a wall, floor, or sharp bracket. Gently observe it while water flows; unusual movement, vibration, or knocking may place stress on the repaired section. Do not pull or twist the pipe to test it. That can weaken a sound repair. If moisture returns, the pipe shifts, or the leak is hidden, stop using the affected fixture and ask a qualified plumbing professional to assess it.
Prevention often means fixing the cause, not just covering the damaged spot. Check for loose supports, condensation, corrosion, and contact with abrasive surfaces. Keep the area accessible and dry, and inspect it periodically, especially after temperature changes or nearby work. It is easy to focus on the sleeve and miss a poor support just beyond it. I would not assume a repair is permanent after one dry check; repeated observation is more reassuring.
How to Repair a Pipe Sleeve in 2026? — How to Inspect the Repair and Prevent Future Damage
| Inspection area | How to inspect | Acceptable condition | If a problem is found | Prevention / record |
|---|---|---|---|---|
| Pipe and sleeve condition | Inspect visible surfaces and the sleeve opening for cracks, deformation, corrosion, sharp edges, or movement. | Sleeve is stable and intact; the pipe is not cut, crushed, or rubbing against a damaging edge. | Repair or replace damaged components. Remove burrs and address the cause of movement before resealing. | Use compatible materials and keep dissimilar metals appropriately isolated where required. Photograph the condition before and after work. |
| Annular space and seal | Check around the full circumference for gaps, loose packing, failed sealant, water tracks, or debris. | The opening is sealed with a material suited to the location and service conditions; no visible gaps or active leakage remain. | Remove failed material, prepare clean and dry surfaces as specified, then install a compatible seal or sealing system. | Follow the sealant or system instructions for joint dimensions, surface preparation, and curing time. Do not seal over wet or contaminated surfaces unless the product permits it. |
| Leak and moisture check | Look for drips, dampness, staining, mineral deposits, or elevated moisture near the sleeve. Check the pipe under normal operating conditions when safe. | No active leakage or new moisture is present after the repair and any required cure period. | Find and correct the water source; resealing the sleeve alone will not fix a leaking pipe or upstream drainage issue. | Record the inspection date, observed condition, repair materials, and post-repair result. Use an appropriate pressure or leakage test only when applicable to the pipe system and local requirements. |
| Pipe support and movement | Check nearby supports and observe whether vibration, thermal movement, or building movement is stressing the penetration. | The pipe is supported as designed and the sleeve seal is not being pulled, compressed, or abraded by movement. | Correct inadequate support or alignment and provide movement accommodation appropriate to the piping system before completing the seal. | Avoid using the sleeve as a pipe support unless the design specifically allows it. Recheck after nearby piping or structural work. |
| Fire-rated or waterproof penetration | Determine whether the wall or floor is fire-rated or forms part of a waterproofing system; inspect the complete penetration assembly. | The repair preserves the required fire-resistance or water-control function using a compatible, approved assembly where required. | Use a qualified professional and a system suitable for the specific penetration. Do not substitute ordinary filler for required firestop or waterproofing materials. | Keep product and installation records, and verify applicable building and fire-code requirements before work. |
| Repair verification | After installation and the specified cure period, visually inspect the seal and check for leakage or renewed movement. | The repair is continuous, secure, and undamaged, with no visible leak under the applicable test or operating condition. | Rework the defect following the repair-system instructions; repeat the relevant inspection or test before closing access. | Keep before-and-after photos and note any limitations, test conditions, and follow-up actions. |
| Ongoing maintenance | Include accessible sleeves in routine building or plumbing inspections and recheck after leaks, vibration, or nearby construction. | No new cracking, corrosion, moisture, seal separation, or pipe-to-sleeve contact is observed. | Investigate changes promptly and repair the underlying cause rather than applying a surface patch alone. | Set inspection frequency according to exposure, system risk, site procedures, and applicable code; there is no single interval suitable for every installation. |
Note: Repair methods and acceptance criteria depend on pipe material, sleeve type, building conditions, and local codes. Follow the applicable design documents and product instructions; consult a licensed professional when the pipe, structure, fire rating, or waterproofing system may be affected.
Related Posts
-
What Are the Top Types of Pipe Fixers?
-
Mastering Internal Pipe Repair Sleeve Techniques for Optimal Results
-
Top 10 Pipe Fixer Types for Global Buyers?
-
Ultimate Guide to Effective Pipe Sleeve Repair Solutions for Global Procurement
-
What is an internal pipe repair sleeve and how does it work?
-

Top 10 Pressure Pipe Suppliers in China You Need to Know?